How to make layouts with Ribbet
I have had many users asking me how I make my layouts, so I have made a tutorial. All of the links to other sites here wil open in new tabs.
1. Finding the image
Use Google images to find an image. To be on the safe side, make sure that the image is 'Free to use, share,or modify, even commercially'. To find one with this setting, click here and scroll down to the bottom. You find a bar like this.
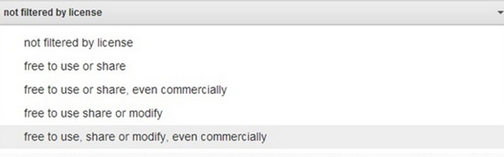
Click on the one at the the bottom, then once you have selected it, click the blue 'Advanced search' button.
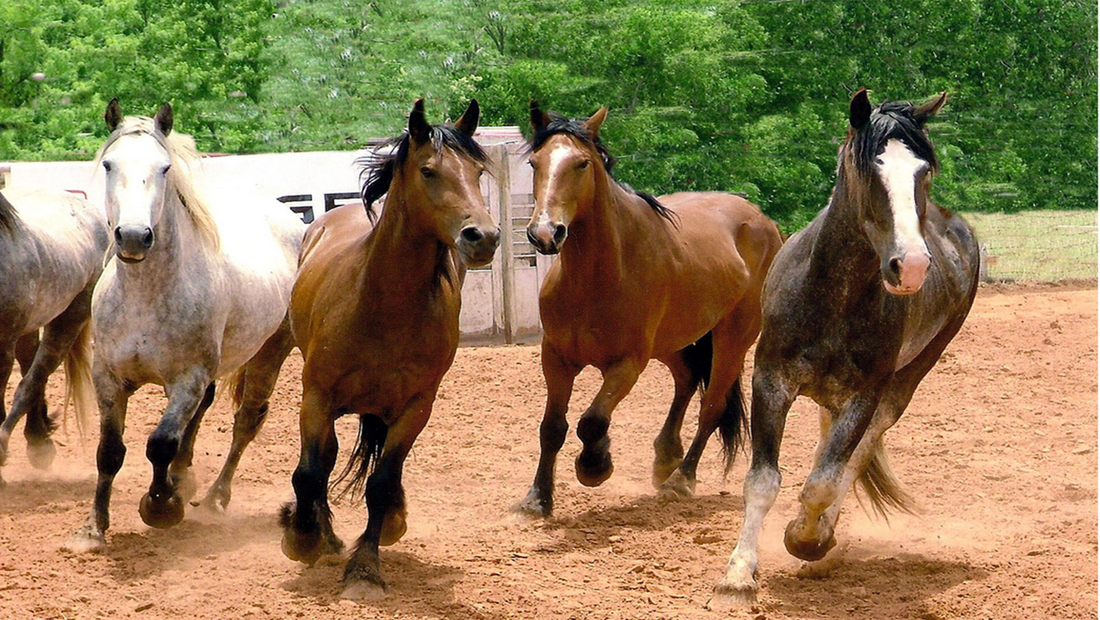
Here is the image that I have chosen from Google images
Here is the image that I have chosen from Google images
2. Editing the image on Ribbet
Now, open up Ribbet. I use Ribbet for my layouts, as it is simple and easy to use. There are many things that you can do on it. I must say, I do prefer Ribbet to GIMP , as it is more simple to use.
Once you have uploaded your photo, it should look like this:
Once you have uploaded your photo, it should look like this:
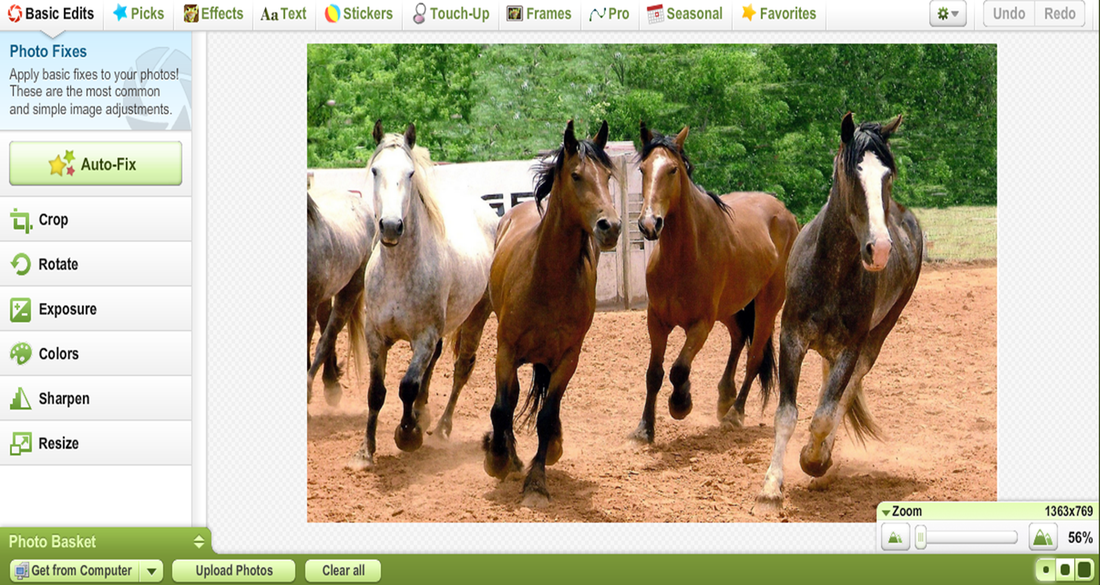
Firstly, you need to re-size your image. Go to 'Basic Edits' then 'Resize'. You will need to change the box on the left to 800. Leave the other box as it is, as that will automatically change. Keep a note of your exact picture size, as you need then later!
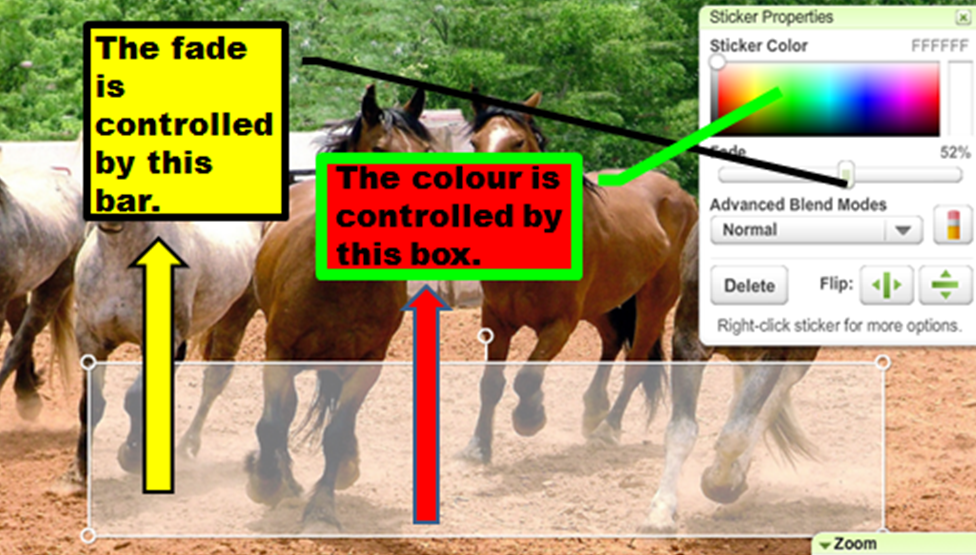
It is time to add the skins for the text boxes. To do this, go to the bar at the top called 'Stickers' (You can see this on the top of the above image). Scroll down until you find 'Geometric'. Click on that, and you can either insert a square, or a rectangular shape. For this tutorial, I will be using the rectangle shape. Once you have put in your chosen shape, it would be best to fade the shape, and change the colour from black. In the example I have been very boring *yawn* and used white.
Look at the picture below to see what does what!
Look at the picture below to see what does what!
Once you have added all of the shapes that you want, you need to label them, and do the title. You can do changeable text box titles and main titles. I will add in how to do that, but not right now. Tip: You can duplicate shapes by right clicking on the shape and selecting 'duplicate shape'.
When you have finished, you need to save it to your documents. Here is a picture of my finished design
When you have finished, you need to save it to your documents. Here is a picture of my finished design
3. Uploading to Tinypic
To get the right code of the image, you need to upload it to Tinypic, a free site for uploading images. Past this circled link into a word document so you will not forget it: (Not the one in the picture, the one that appears when you upload your own photo.)

4. The HTML code!
Many people think that HTML is confusing, but really it is not! (Trust me)
Open up draac code tester or www.w3schools.com
If you go on draac, make the box bigger (drag the lined corner of the white box down).
Now it is time for the code!
The stuff in red is the stuff that you fill in yourself.
On the first line, put:
<div style="background: url('DIRECT LINK OF YOUR IMAGE HERE'); width: XXXpx; height: XXXpx;">
Remember that Tinypic link? Put that link where it says 'DIRECT LINK OF YOUR IMAGE HERE' Only get rid of the things in red!
Also, remember the size or your image that you recorded? You need to put that where the XXX's are. The width is 800 px (pixels) , and the height depends on what image you chose.
On the next line (press enter) , put:
<div style="width: XXXpx; height: XXXpx; overflow: auto; text-align: XXXX; margin-top: XXXpx; margin-left: XXXpx; float: left;">
the XXXs in the width and height sections are width and height of your text boxes (in pixels). For now, put in about 140 X 180. Later, you can adjust it until it looks right.
The text-align is how the text in the text box is aligned. It can be center, left, or right.
The margins very important. They tell the computer where it needs to put the text boxes. The margin-top is how far from the top of the image the text box is, and the margin-left is how far from the left side of the picture it is.
For now, in the margin-top, put 105, and in the margin-left, put 80. As I said, you can adjust this at any time.
Press enter again, and on the next line, put
<font color="black" size="1" face="arial">
This is for the font colour, size and what font you want. You can type in any colour like white, blue, green, orange etc. However, if you want more variety to choose from, have a look at the image at the bottom of the page. The colours all have codes like #FFFF . So, if you want a different shade of a colour, just paste the code in the same place. For the size, you should put a minimum of 2, as 1 is very small. To look at fonts, please click here
On the next line, you can put in the text. Make sure you have enough text to make the text box scroll. If the text box does not scroll, then just add more text.
text text text text text text text text text text text text text text text text text text text text text text text text text text text text text text text text text text text text text text text text text text text text text text text text text text text text text text text text text text text text text text text text text text text text text text text text text text text text text text text text text text text text text text text text text text text text text text text text text text text text text text text text text text text text text text text text text text text text text text text text text text text text text text text text text text text text text text text text text text text text text text text text text text text text text text text text text text text text text text text text text text text text text text text text text text text text text text text text text text text text text text text text text text text text text text text text text text text text text text text text text text text text text text text text text text text text text text text text
On the next line put this
</font></div>
Then on the next new line, finish it of with
,</div>
If the boxes are not in the right place, you can edit it, so they fit and are in the right place.
To get more text boxes, simply copy and paste the yexy box code from code from the <div style="width: XXXpx; height: XXXpx; overflow: auto; text-align: XXXX; margin-top: XXXpx; margin-left: XXXpx; float: left;"> bit through to the
</font></div> bit. Make sure you have no code below that last </div>. That must stay at the end of all the code, otherwise ot will not work. Below is my final image. If you have any question, ask them in the comments box at the bottom of the page.
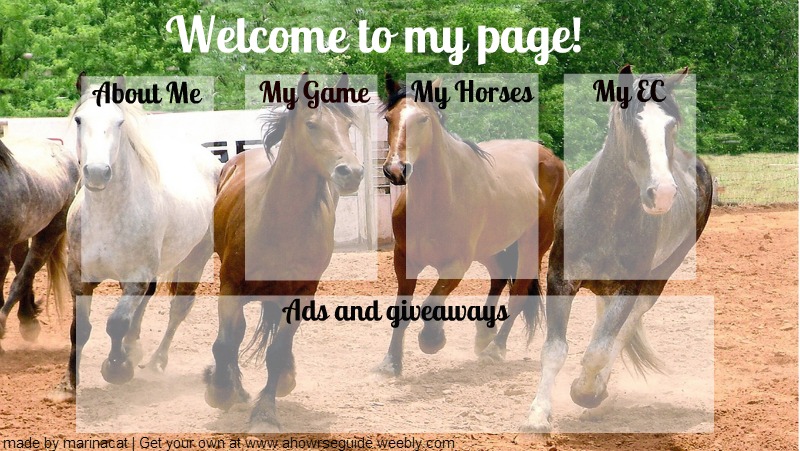
The finished thing!
Here is my finished layout. You can get it in the Pre made layouts section.
text text text text text text text text text text text text text text text text text text text text text text text text text text text text text text text text text text text text text text text text text text text text text text text text text text text text text text text text text text text text text text text text text text text text text text text text text text text text text text text text text text text text text text text text text text text text text text text text text text text text text text text text text text text text text text text text text text text text text text text text text text text text text text text text text text text text text text text text text text text text text text text text text text text text text text text text text text text text text text text text text text text text text text text text text text text text text text text text text text text text text text text text text text text text text text text text text text text text text text text text text text text text text text text text text text text text text text text
text text text text text text text text text text text text text text text text text text text text text text text text text text text text text text text text text text text text text text text text text text text text text text text text text text text text text text text text text text text text text text text text text text text text text text text text text text text text text text text text text text text text text text text text text text text text text text text text text text text text text text text text text text text text text text text text text text text text text text text text text text text text text text text text text text text text text text text text text text text text text text text text text text text text text text text text text text text text text text text text text text text text text text text text text text text text text text text text text text text text text text text text text text text text text text text text text text text text text text text text text text text text text text text text text text text text text text text
text text text text text text text text text text text text text text text text text text text text text text text text text text text text text text text text text text text text text text text text text text text text text text text text text text text text text text text text text text text text text text text text text text text text text text text text text text text text text text text text text text text text text text text text text text text text text text text text text text text text text text text text text text text text text text text text text text text text text text text text text text text text text text text text text text text text text text text text text text text text text text text text text text text text text text text text text text text text text text text text text text text text text text text text text text text text text text text text text text text text text text text text text text text text text text text text text text text text text text text text text text text text text text text text text text text text text text text
text text text text text text text text text text text text text text text text text text text text text text text text text text text text text text text text text text text text text text text text text text text text text text text text text text text text text text text text text text text text text text text text text text text text text text text text text text text text text text text text text text text text text text text text text text text text text text text text text text text text text text text text text text text text text text text text text text text text text text text text text text text text text text text text text text text text text text text text text text text text text text text text text text text text text text text text text text text text text text text text text text text text text text text text text text text text text text text text text text text text text text text text text text text text text text text text text text text text text text text text text text text text text text text text text text text text text text text
text text text text text text text text text text text text text text text text text text text text text text text text text text text text text text text text text text text text text text text text text text text text text text text text text text text text text text text text text text text text text text text text text text text text text text text text text text text text text text text text text text text text text text text text text text text text text text text text text text text text text text text text text text text text text text text text text text text text text text text text text text text text text text text text text text text text text text text text text text text text text text text text text text text text text text text text text text text text text text text text text text text text text text text text text text text text text text text text text text text text text text text text text text text text text text text text text text text text text text text text text text text text text text text text text text text text text text text
Comment Box is loading comments...
